Feature #217

Creando los comandos de joystick de USB
Description
A partir de los datos del DRE, crear los comandos para enviarlos por USB.
Hay que usar la arquitectura de software de gatATAC Osek.
hay que crear contenido para codificar los mensajes USB para los siguientes ficheros:
- prj_output.h
- prj_output.cpp
Hay que tener en cuenta la información de https://www.pjrc.com/teensy/td_joystick.html
photo668429746462369756.jpg View (110 KB)
photo668429746462369755.jpg View (158 KB)
photo668429746462369753.jpg View (105 KB)
photo668429746462369754.jpg View (176 KB)


History
#1
 Updated by Txinto Vaz about 8 years ago
- Description updated (diff)
- Status changed from New to In Progress
- % Done changed from 0 to 100
Creamos los siguientes ficheros
Outputs del sistema
Configuración: prj_output.h
#ifndef _PRJ_OUTPUT_H
#define _PRJ_OUTPUT_H

/* Inclusion of the basic types of the GTTC osek */
#include "gttc_types.h"

/* Initialization of the output routines.
WARNING: The pinout initialization is not done here.
It is done in the prj_pinout.c file */
void prjOutputInit(void);

/* Routine to read all the outputs in the system
EXCEPTION: The inputs coming through an I/O bus can be synthesized in another module.*/
void prjOutput(void);

#endif /* _PRJ_OUTPUT_H */
Síntesis de los comandos: prj_output.cpp
/* This file perform the synthesis tasks of the output of the system */

/* Inclusion of the basic types of the GTTC osek */
#include "gttc_types.h"
/* Configuration of the project */
#include "prj_cfg.h"
/* Inclusion of its own header */
#include "prj_output.h"
/* Inclusion of the pinout information */
#include "prj_pinout.h"
/* Inclusion of the DRE */
#include "prj_dre.h"
/* Inclusion of the arduino methods */
#include "Arduino.h"

/* Initialization of the output routines.
WARNING: The pinout initialization is not done here.
It is done in the prj_pinout.c file */
void prjOutputInit(void) {
  digitalWrite(CFG_POWERGND_PIN,LOW);
  // configure the joystick to manual send mode.  This gives precise
  // control over when the computer receives updates, but it does
  // require you to manually call Joystick.send_now().
  Joystick.useManualSend(true);

}

/* Routine to read all the outputs in the system
EXCEPTION: The inputs coming through an I/O bus can be synthesized in another module.*/
void prjOutput(void) {
  /* When any button is pressed, the power pin will be switched down to indicate something is detected */
  /* By default, the power led must be active */
  digitalWrite(CFG_POWERGND_PIN,LOW);

  /************* BUTTONS SECTION ***************/

  // read digital pins and use them for the buttons
  for (uint8_t i=0; i<CFG_JOYSTICK_NUMBER_OF_BUTTONS ; i++) {
    if (dre.detection.allButtons[i] == 1) {
      /* When any button is pressed, the power pin will be switched down to indicate something is detected */
      digitalWrite(CFG_POWERGND_PIN,HIGH);
    }
    /* Update USB data structure */
    Joystick.button(i + 1, dre.detection.allButtons[i]);
  }

  /************ JOYSTICK SECTION ***************/

  // 512 is resting position
  // "value" is from 0 to 1023
  int valueX = CFG_USB_JOYSTICK_REST_POS;
  int valueY = CFG_USB_JOYSTICK_REST_POS;

  for (uint8_t i=0; i<CFG_JOYSTICK_NUMBER_OF_POSITIONS ; i++) {
    if (dre.detection.detectedJoy[i]) {
      /* When any button is pressed, the power pin will be switched down to indicate something is detected */
      digitalWrite(CFG_POWERGND_PIN,HIGH);
    }
  }

  if (dre.detection.detectedJoy[CFG_JOY_LEFT_IDX]){
    valueX=CFG_USB_JOYSTICK_LEFT_POS;
  }
  if (dre.detection.detectedJoy[CFG_JOY_RIGHT_IDX]){
    valueX=CFG_USB_JOYSTICK_RIGHT_POS;
  }
  if (dre.detection.detectedJoy[CFG_JOY_UP_IDX]){
    valueY=CFG_USB_JOYSTICK_UP_POS;
  }
  if (dre.detection.detectedJoy[CFG_JOY_DOWN_IDX]){
    valueY=CFG_USB_JOYSTICK_DOWN_POS;
  }

  /* Update USB data structure */
  Joystick.X(valueX);            // "value" is from 0 to 1023
  Joystick.Y(valueY);            //   512 is resting position

  /*********** Send the USB commands */

  // Because setup configured the Joystick manual send,
  // the computer does not see any of the changes yet.
  // This send_now() transmits everything all at once.
  Joystick.send_now();
}
#2
Updated by Txinto Vaz about 8 years ago
- File photo668429746462369756.jpg View added
- File photo668429746462369755.jpg View added
- File photo668429746462369754.jpg View added
- File photo668429746462369753.jpg View added
A continuación algunas capturas de su validación:
Abajo derecha:
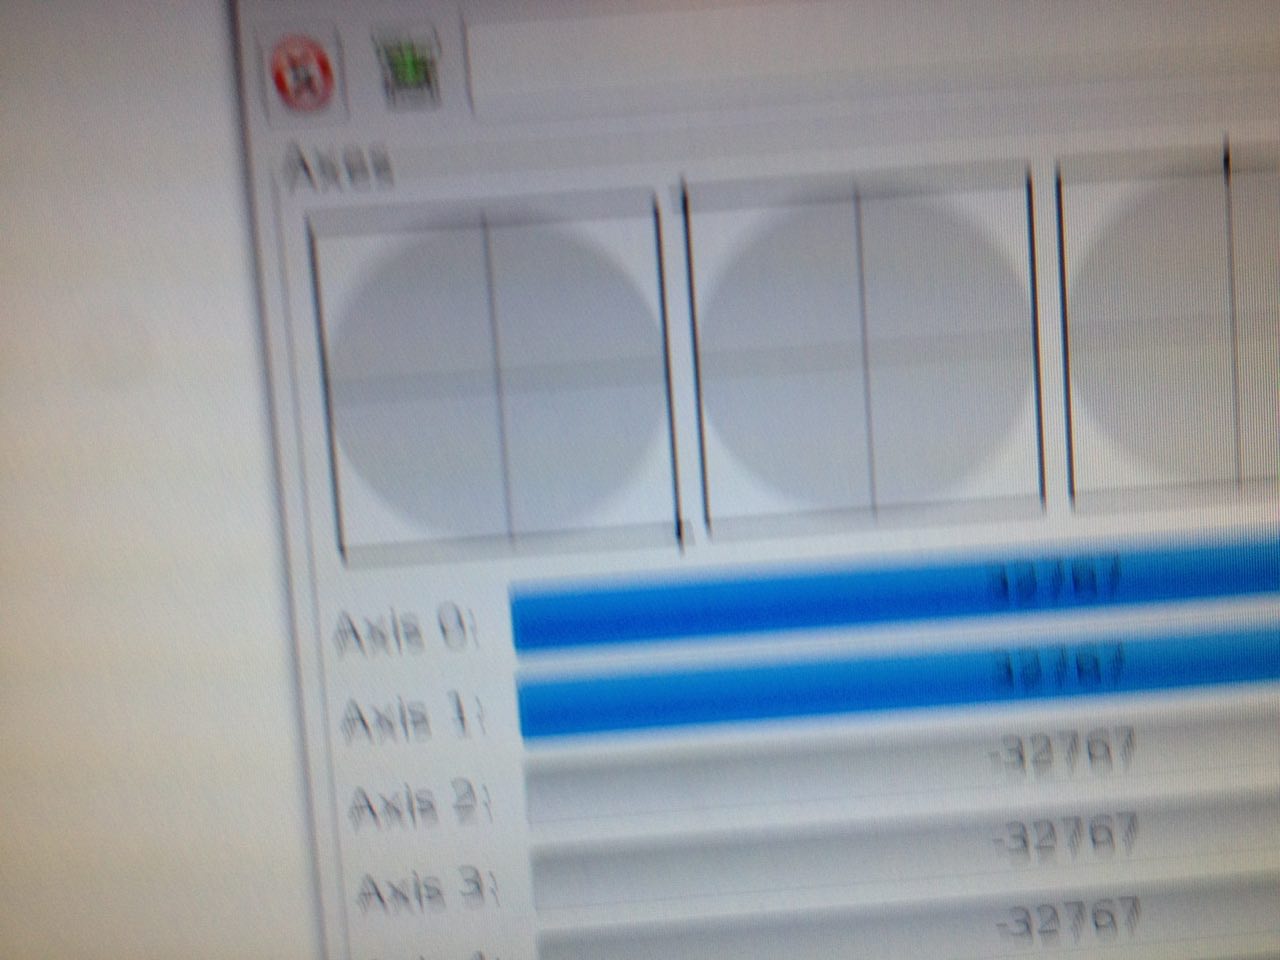
Arriba derecha:
Derecha:
Todos los botones pulsados: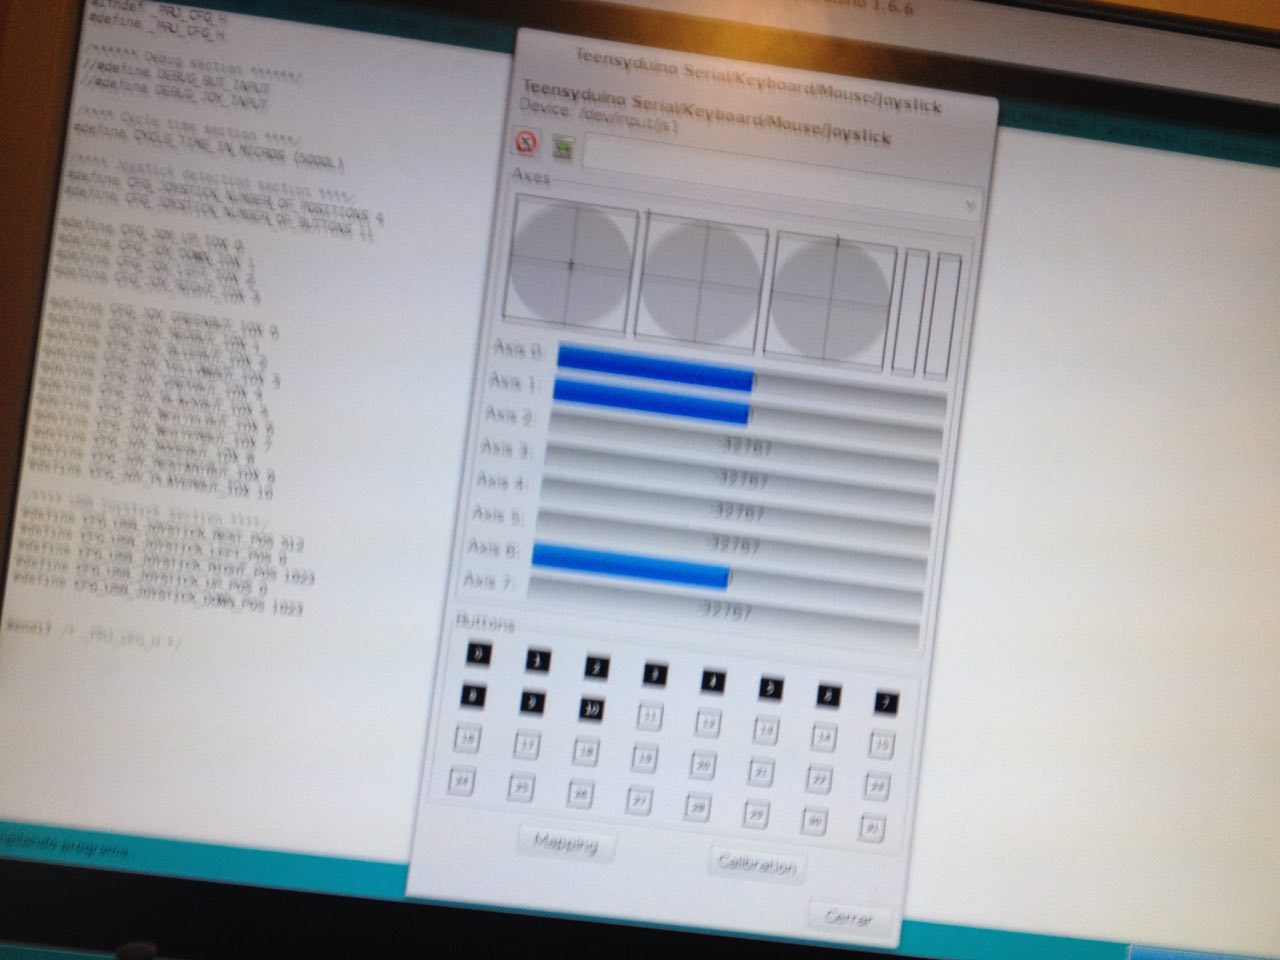
#3
Updated by Txinto Vaz about 8 years ago
- Status changed from In Progress to Resolved
#4
Updated by Txinto Vaz about 8 years ago
- Status changed from Resolved to Closed